
Mercedes-Benz E-Class W213: 64-Color Ambient Lighting & Turbine Vents Retrofit Guide
The Mercedes-Benz E-Class W213 (2016–2023) is renowned for its widescreen cockpit and dual displays. However, many factory models come with basic single-zone lighting or lack illuminated turbine vents and 4D rotating tweeters. This technical installation manual outlines the exact procedures for upgrading your W213 cabin using factory-style plug-and-play components.
Required Installation Tools
- Torx Screwdrivers: T20 (Dashboard & vents) and T30 (Door cards)
- Plastic Trim Removal Pry Bars
- Mercedes AC Vent Removal Pull-Hooks
- Hot Melt Glue Gun or Soldering Iron (for securing speaker brackets)
Step-by-Step Installation Procedures
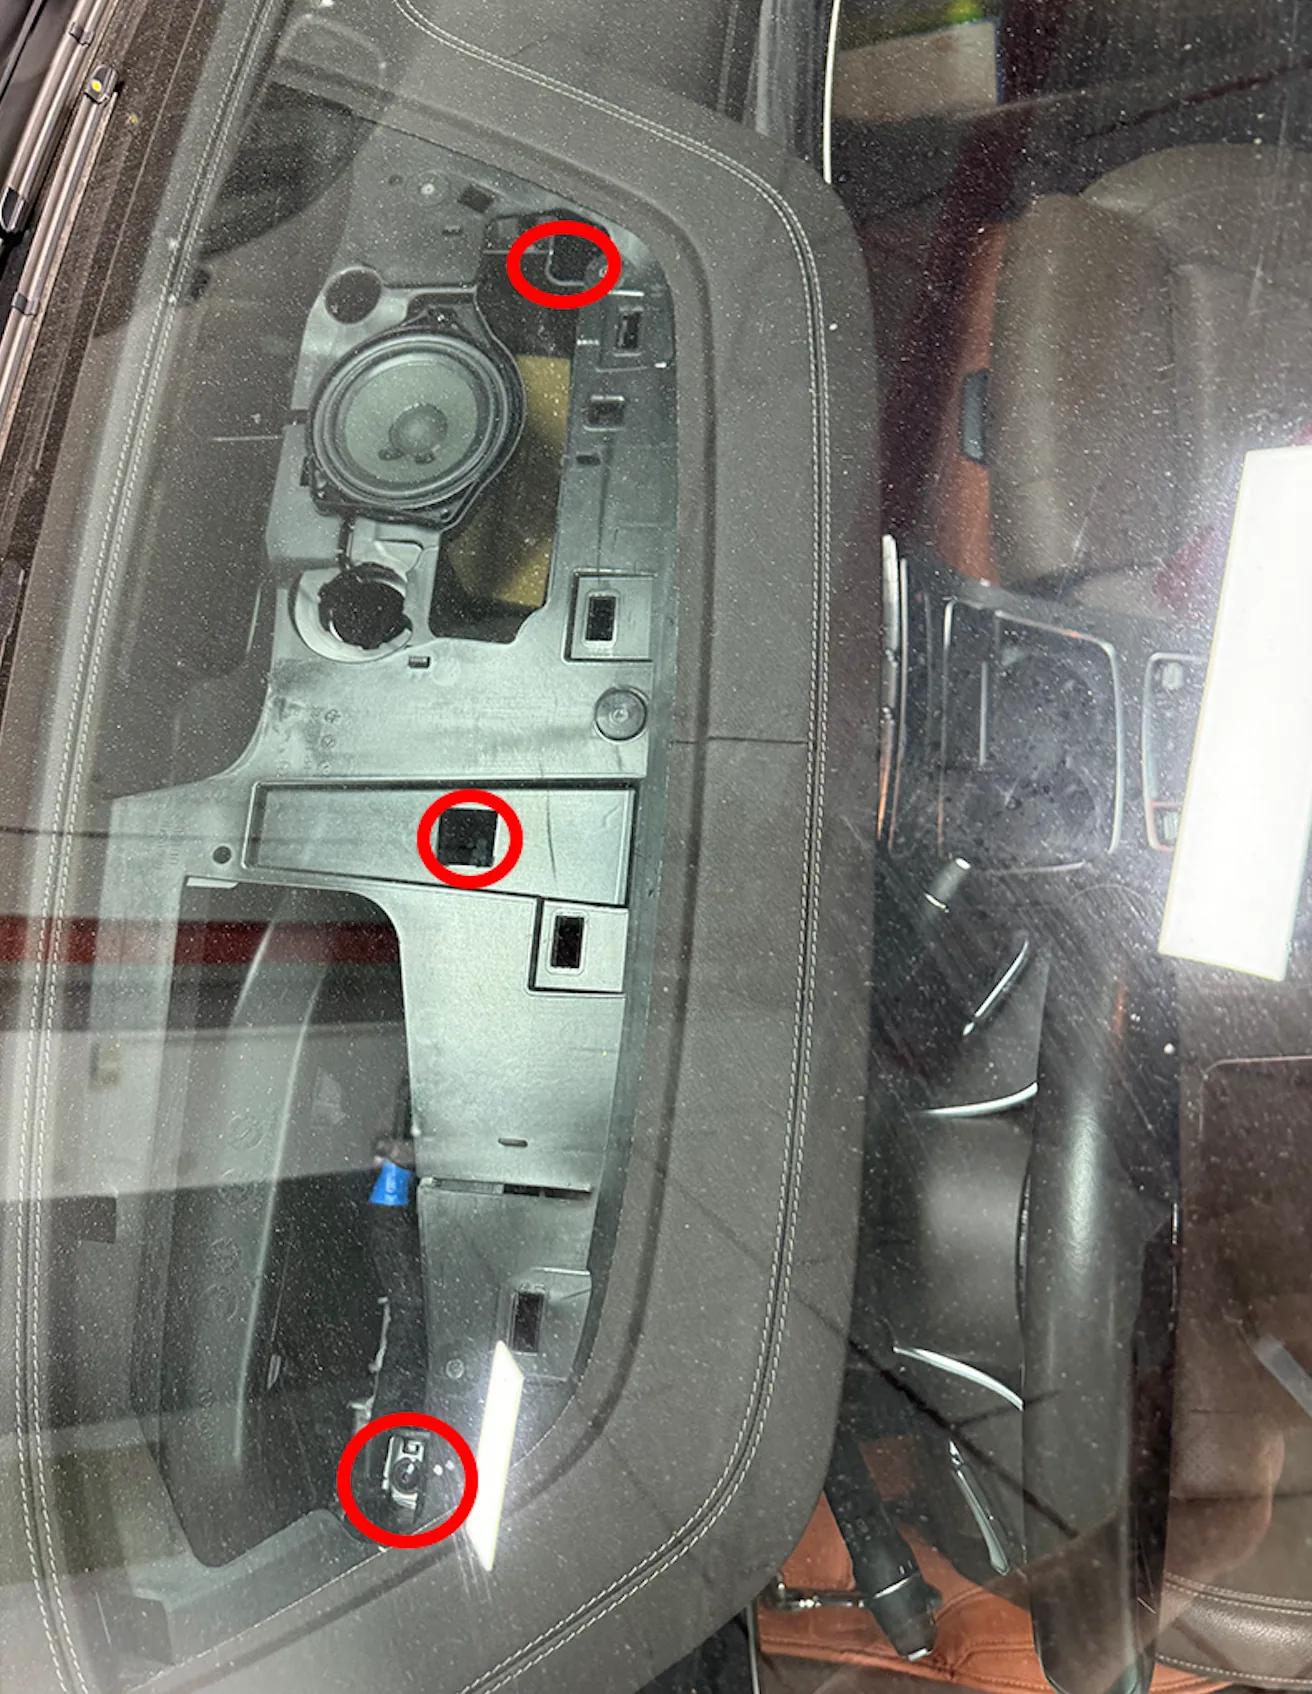
Pry open the dashboard top center grille to access and unfasten three T20 Torx screws. Carefully pull the widescreen dual display forward from both upper corners and disconnect the rear wiring harnesses.
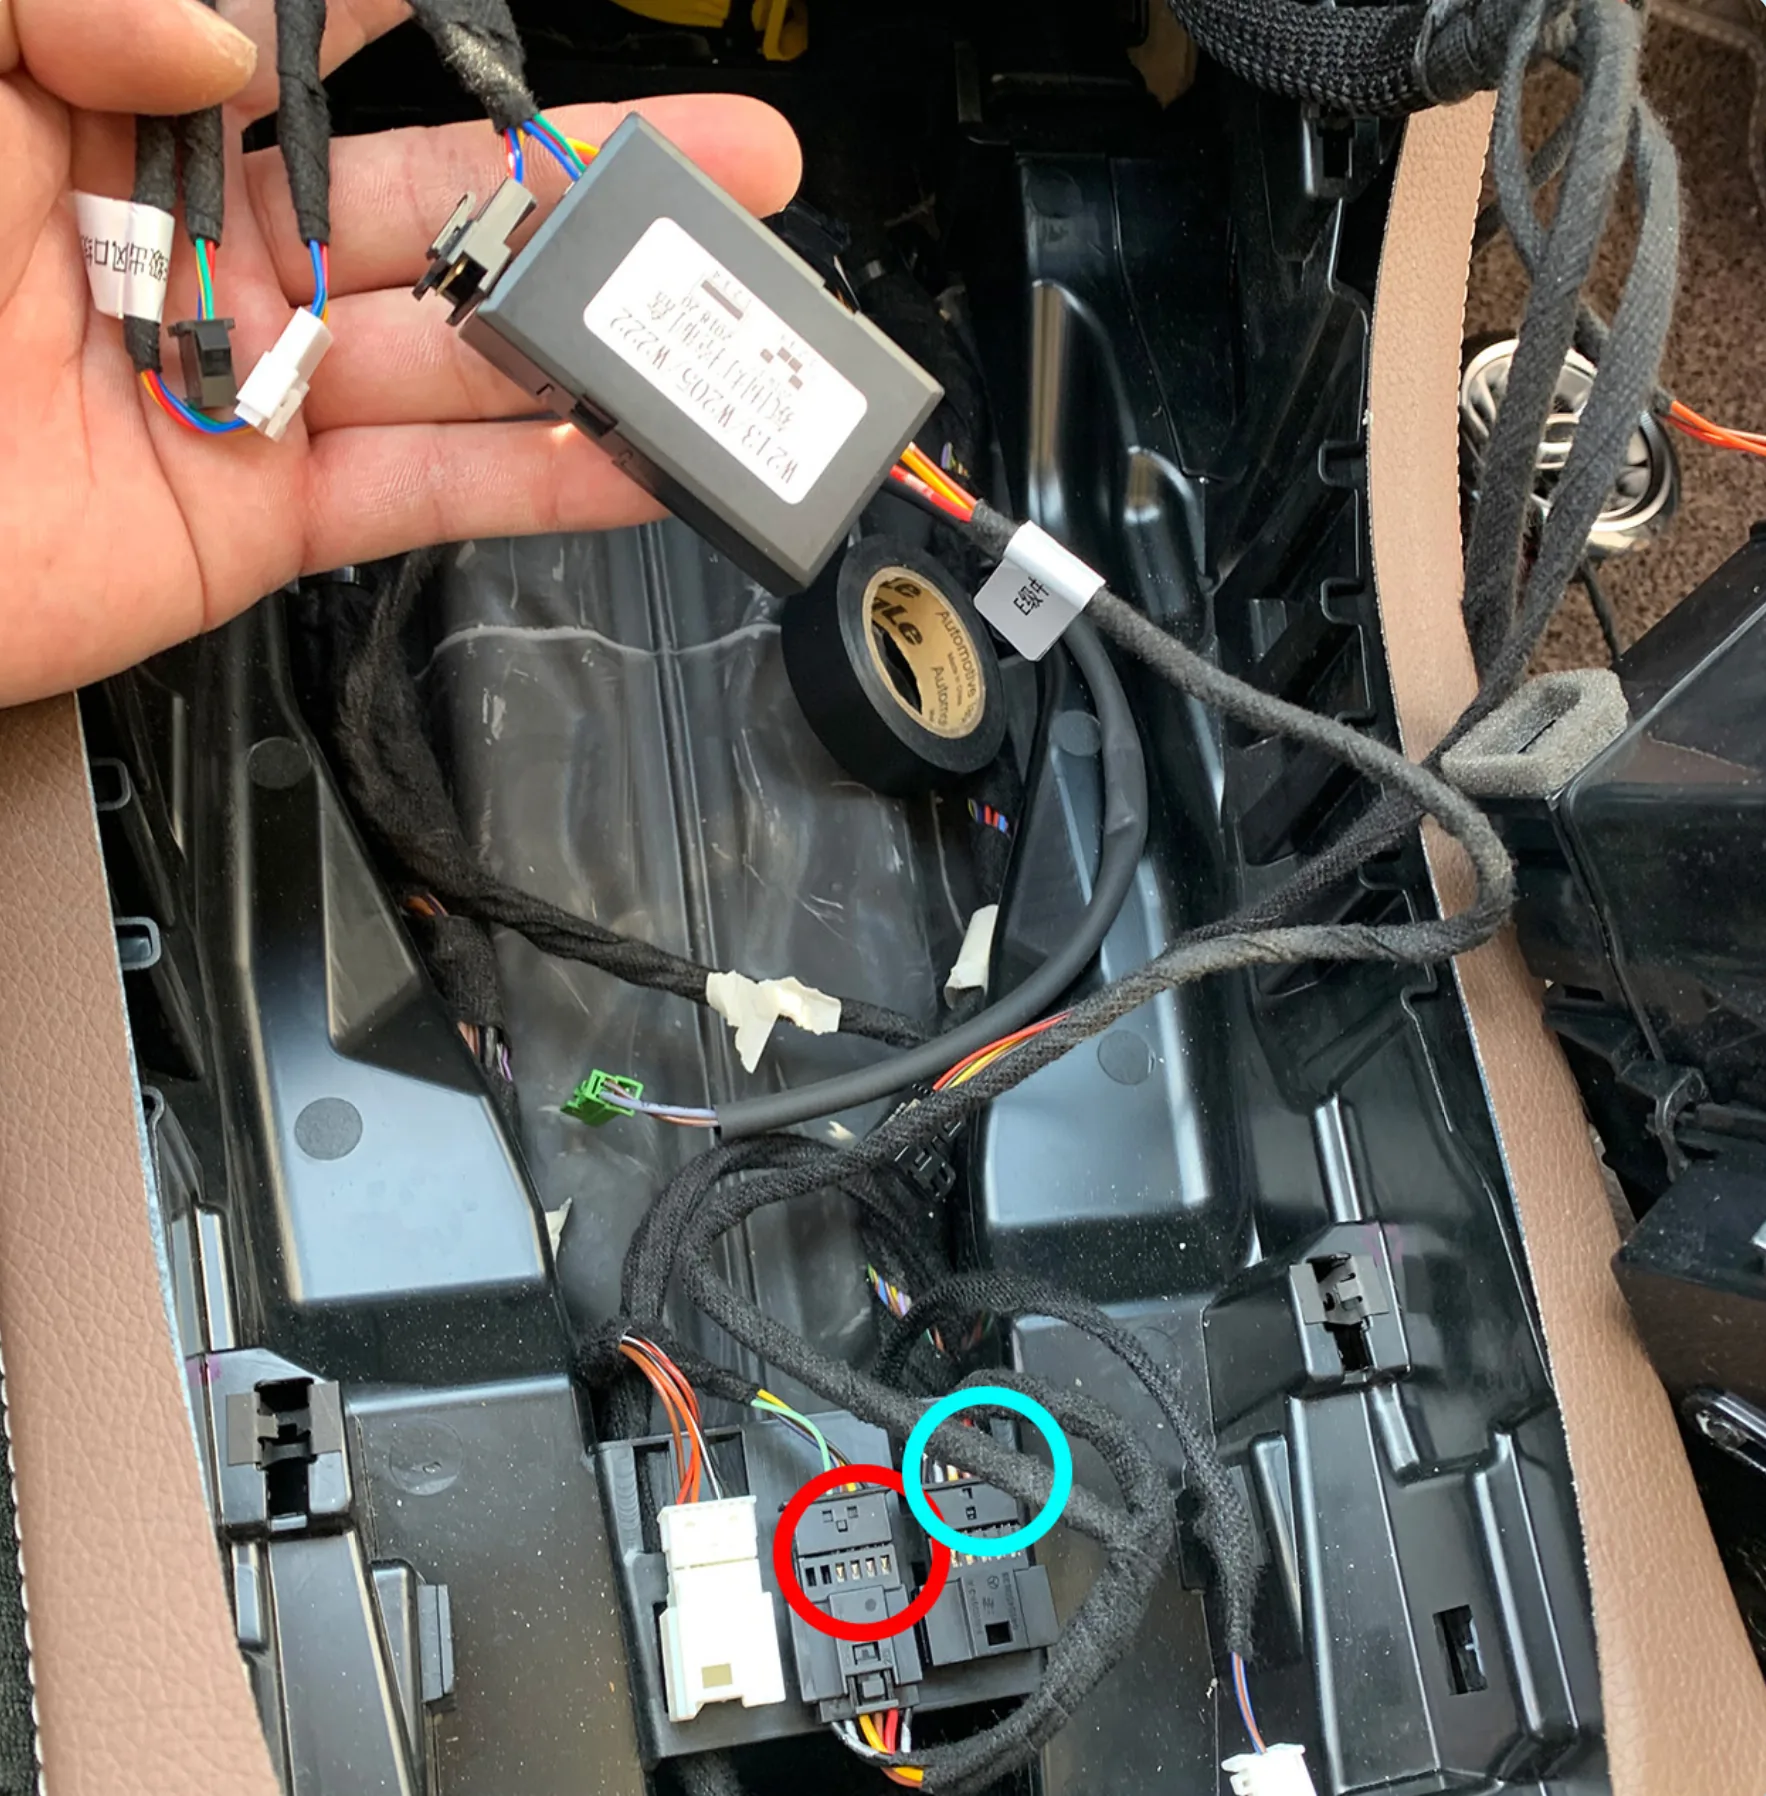
Next, access the factory center cup holder light wiring harness. Connect our custom Y-adapter harness directly into the factory connector for non-destructive pass-through power pickup without wire splicing.
Unscrew the T20 screws securing the center vent assembly, snap in the new illuminated turbine air vents with the "TOP" indicator facing upwards, and push the assembly back into the dashboard.
Using a plastic pry tool, pry off the rear AC outlet panel from the lower edge (held strictly by retention clips with no screws inside). Gently depress the retention buckles outward to remove the original air vent switch and transfer it to the replacement turbine assembly.
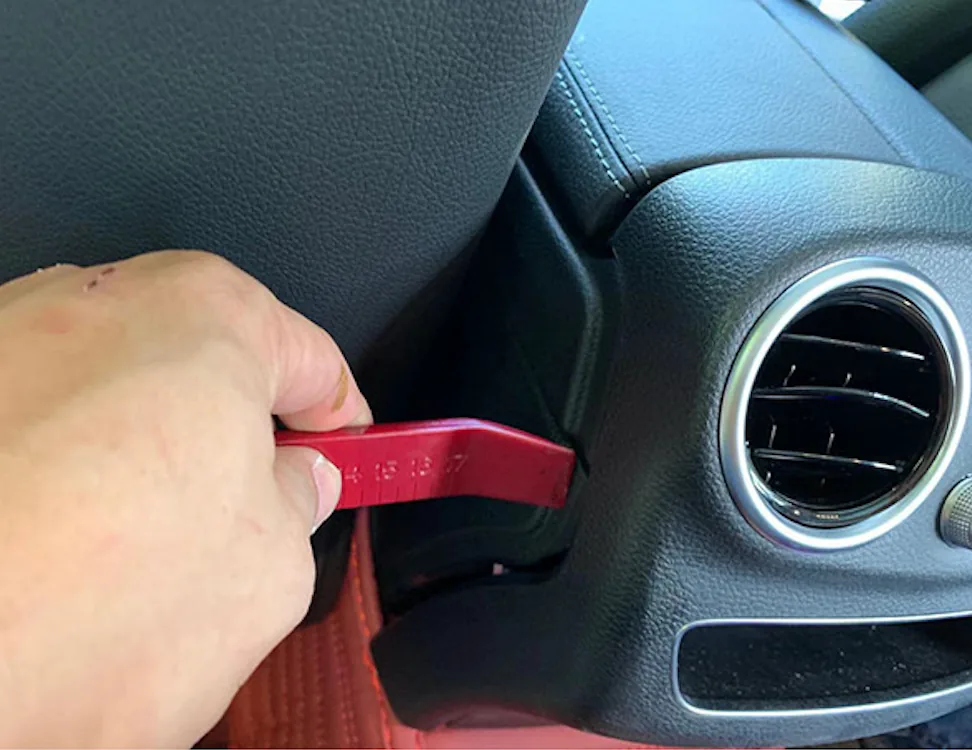
1. Pry out rear AC panel (no screws inside)
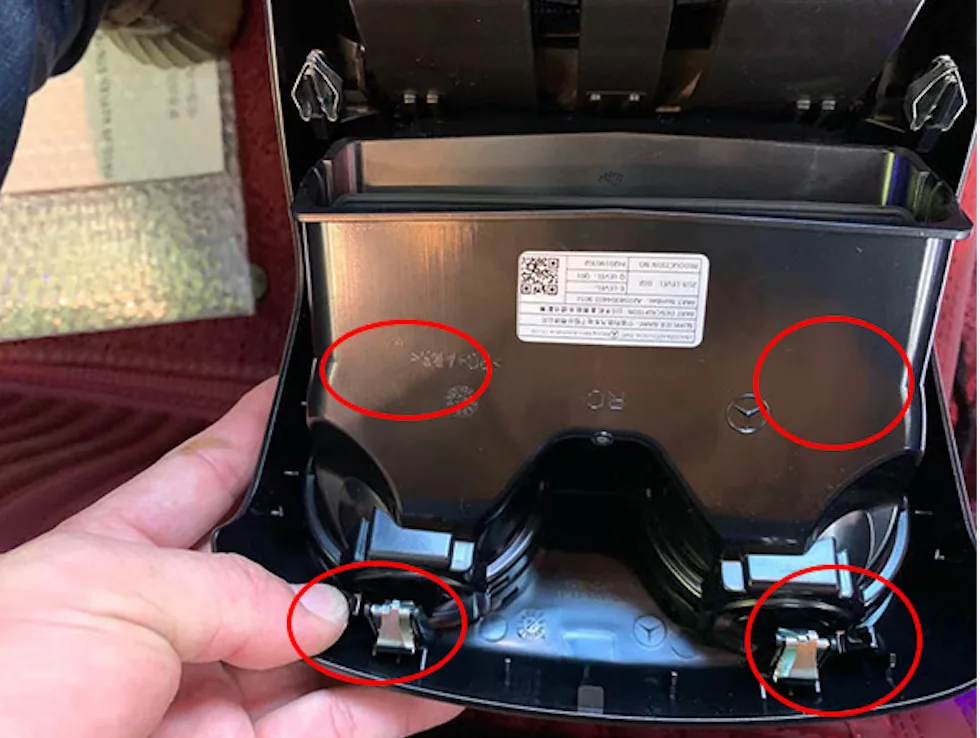
2. Gently pry retention buckles outward to remove vent
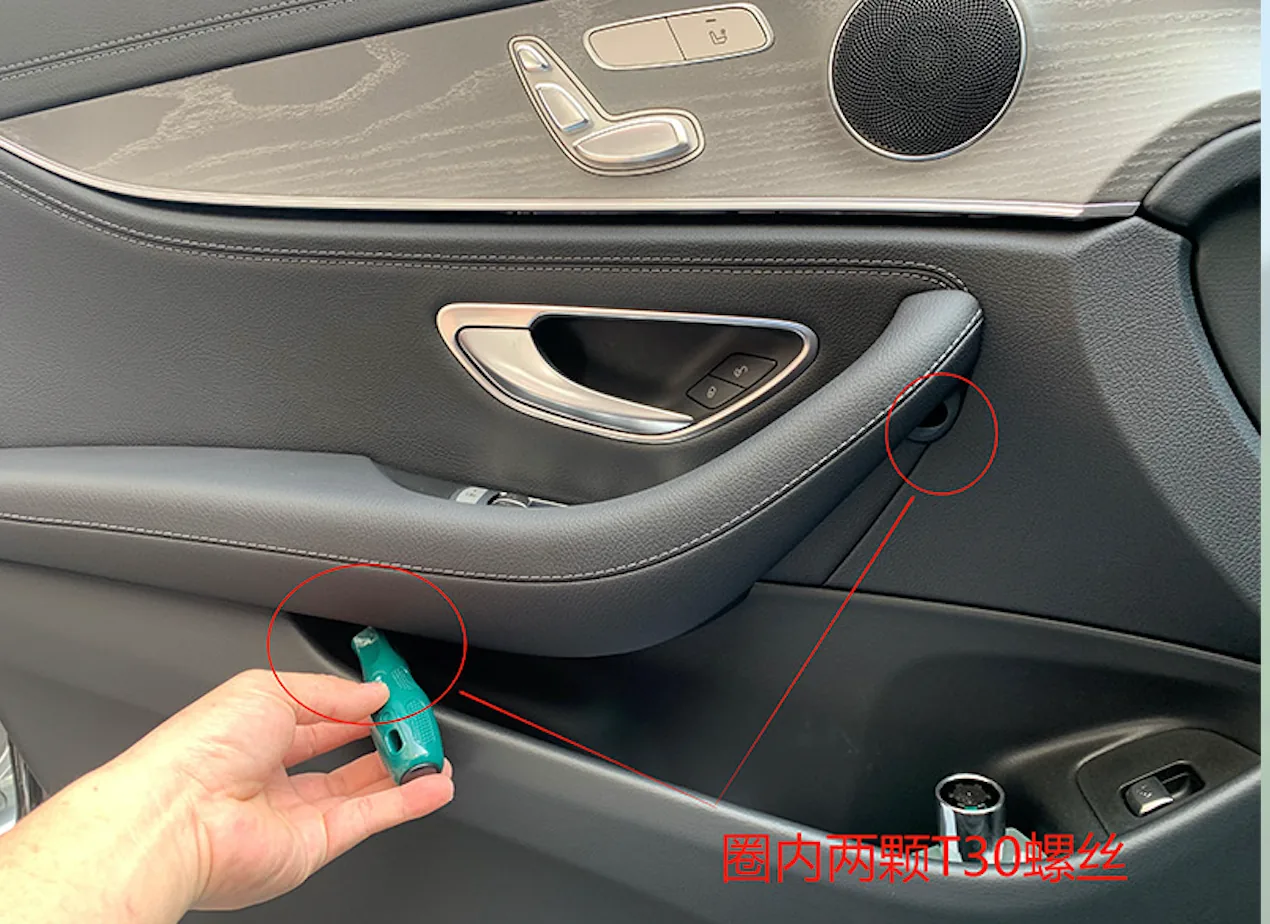
Pry off the small plastic trim cover inside the door handle cavity to unfasten two T30 screws. Release the door card clips and disconnect the door module plugs.
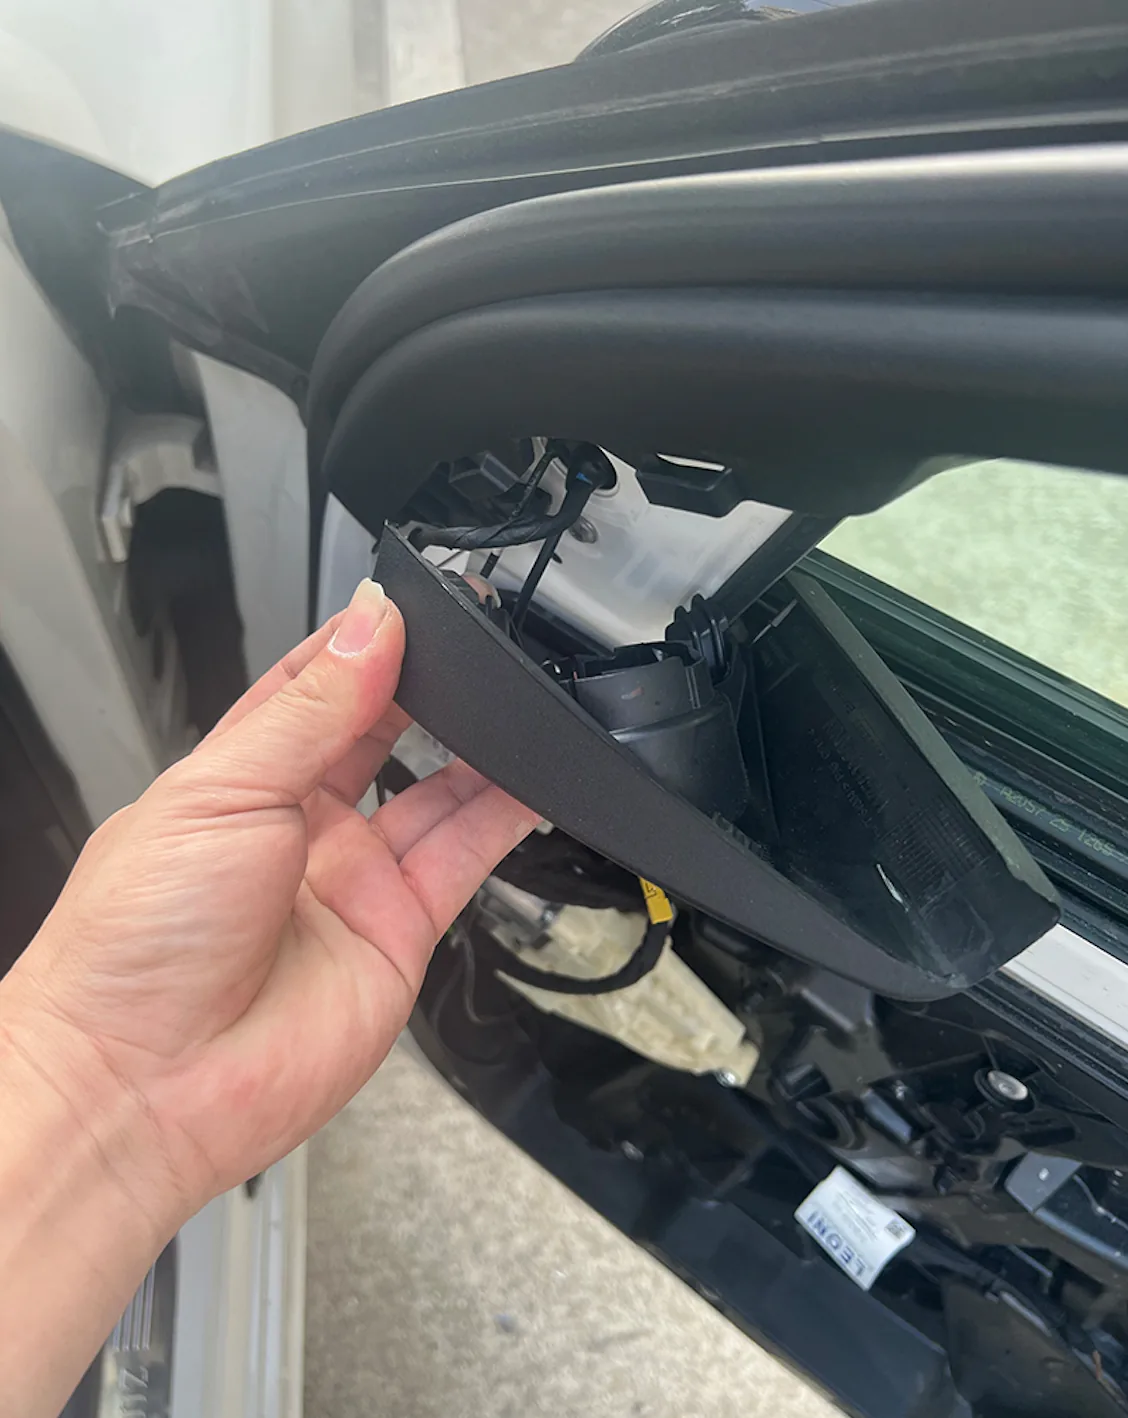
Remove the triangular plastic corner trim from the A-pillar and unclip the factory tweeter. Snap in the motorized 4D rotating tweeter assembly and connect to the door module.
Pry down the overhead reading lamp console from the front edge and connect the ambient light jumper harness. If colors do not synchronize immediately after installation, open the central screen ambient lighting menu, adjust brightness to 0, and then return to 100 to trigger CAN-bus address reset.
Direct Technical Support: support@automotivesjd.com | WhatsApp: +86 198 6266 1261